
 EN
EN  SV
SV Before you download
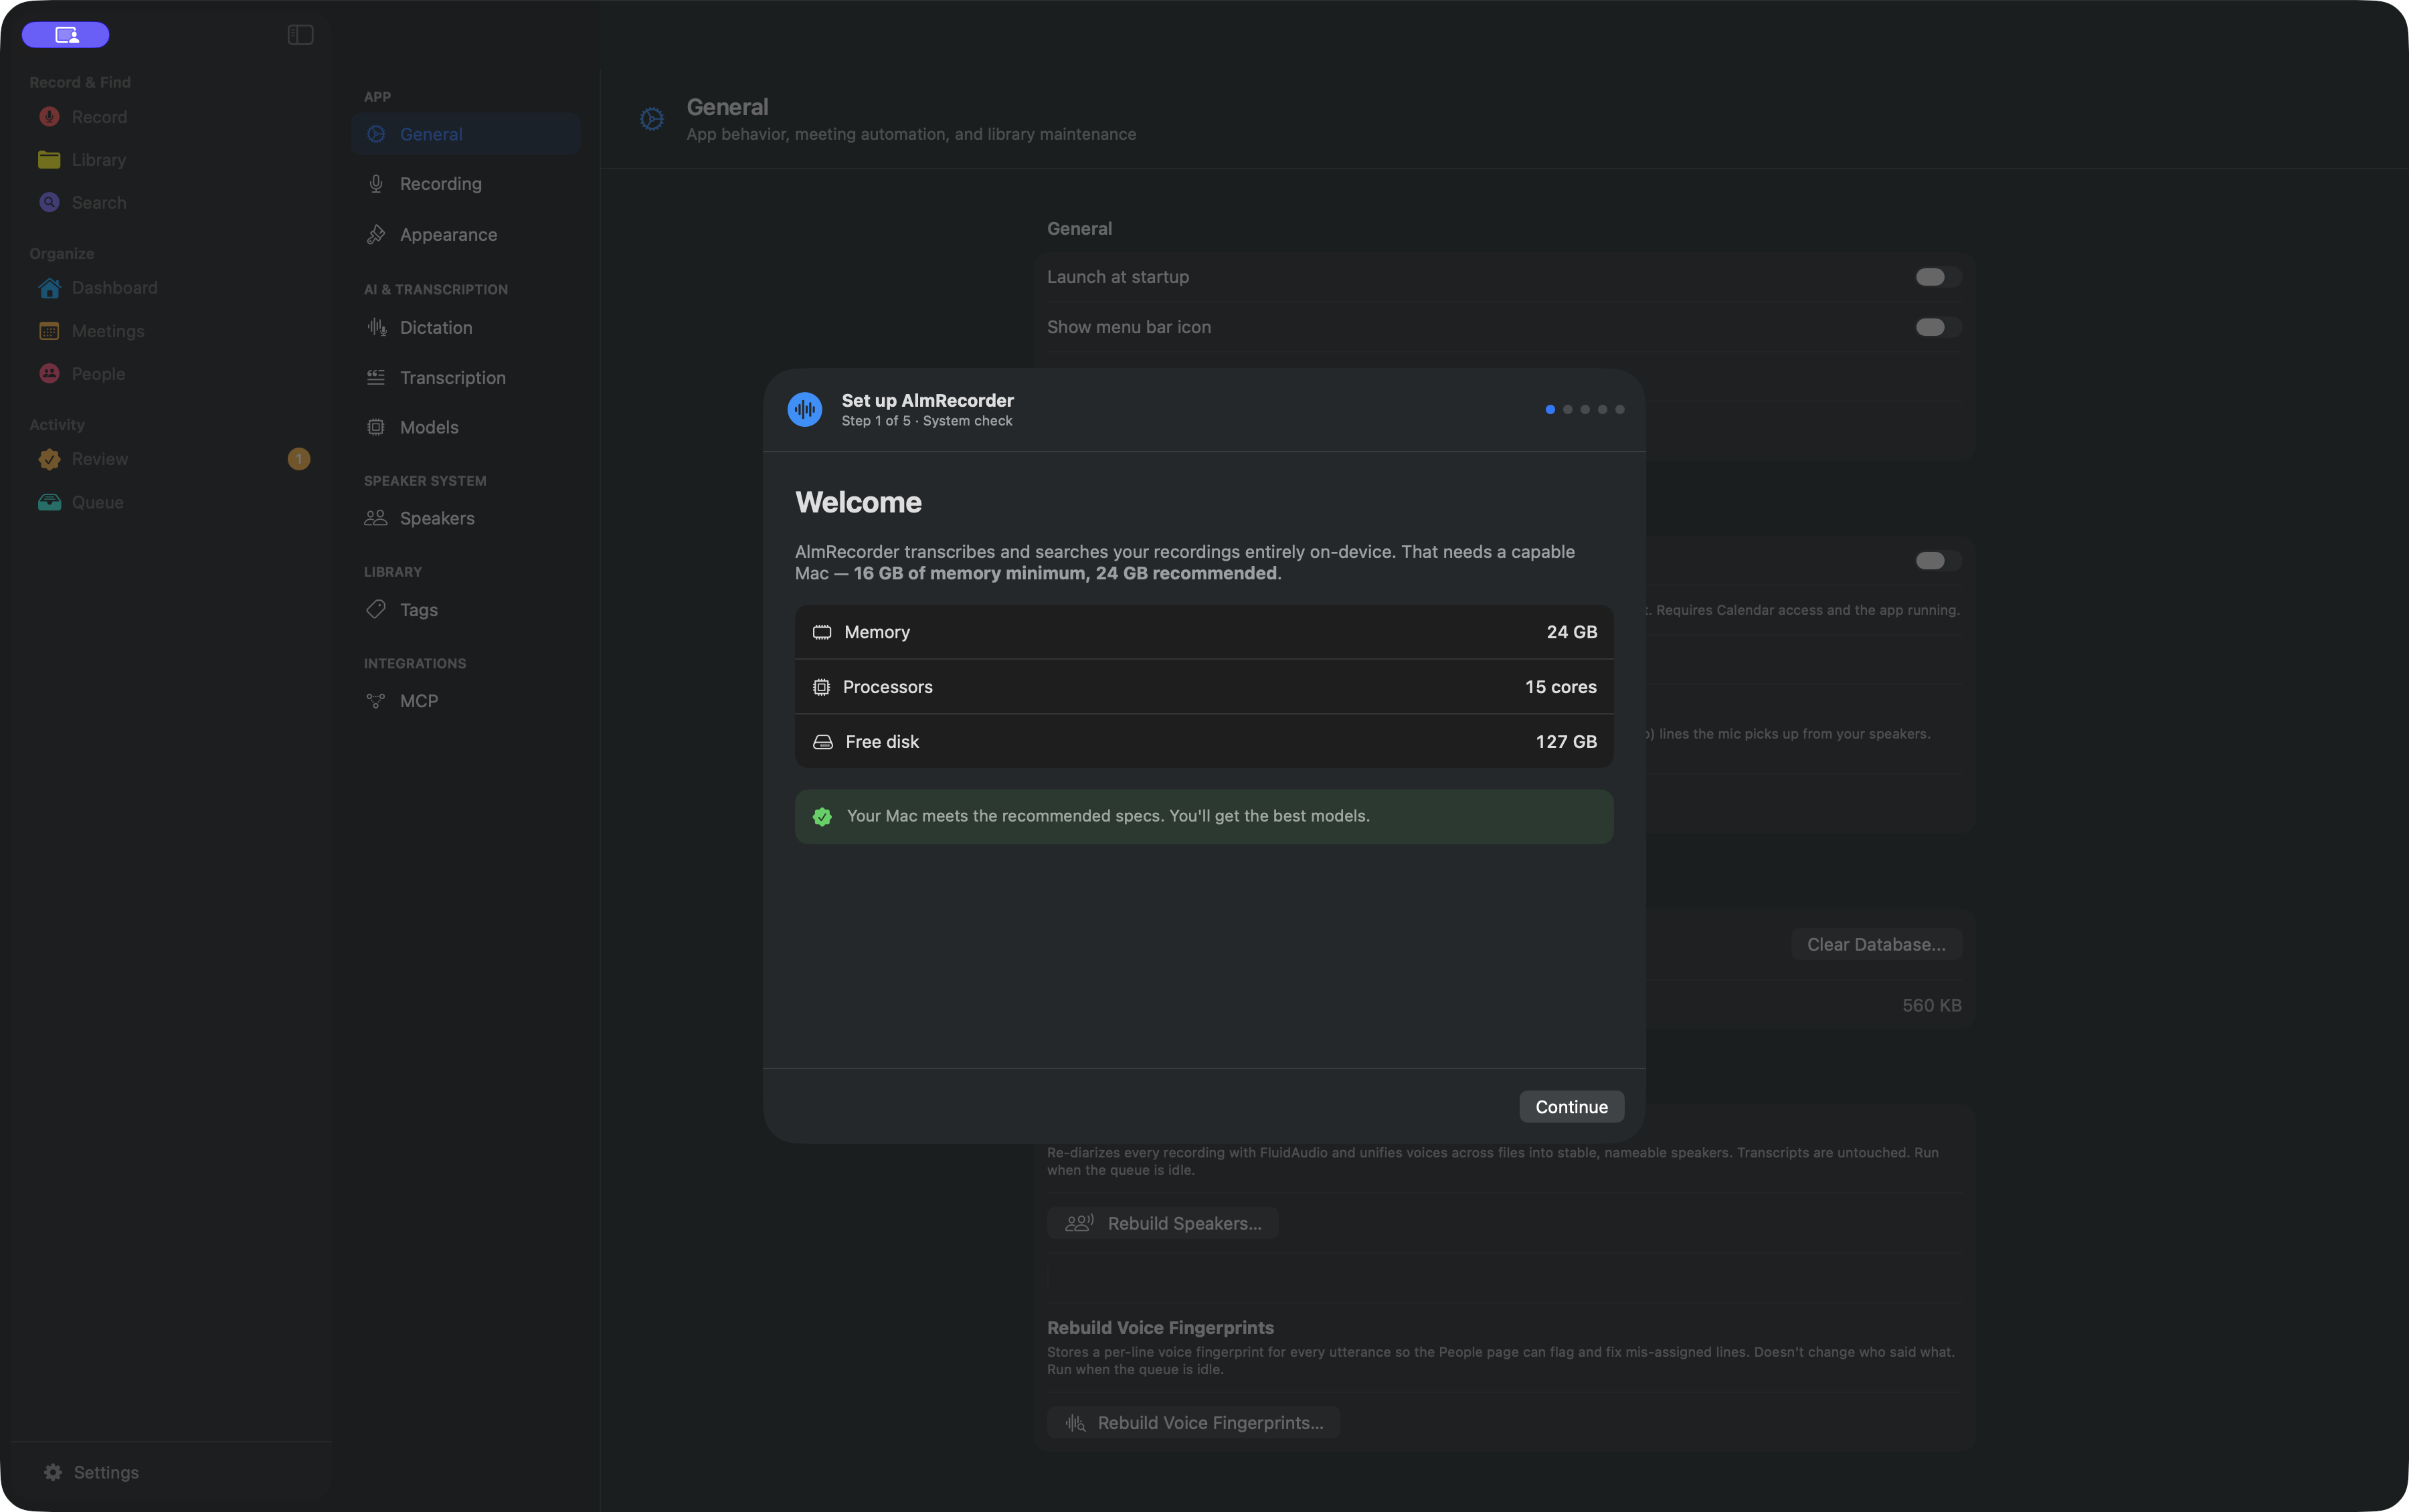
AlmRecorder is built for Apple Silicon and macOS 14 or later. Standard local transcription can use lighter models, while the complete VibeVoice, Whisper, and Gemma quality pipeline is intended for a Mac with 24 GB or more and roughly 18 GB of free disk space. Models take several gigabytes in addition to the app.
The current GitHub build is not Apple-notarized, so the first launch needs one extra confirmation.
Install the app
- Download AlmRecorder 1.1.0 and its SHA-256 file from the official release.
- In Terminal, open the download folder and run
shasum -a 256 -c AlmRecorder-1.1.0-community.dmg.sha256. Continue only when it reports OK. - Open the DMG and drag AlmRecorder into Applications.
- Eject the DMG. Run the copy in Applications—not the mounted image.
- Control-click or right-click AlmRecorder, choose Open, then confirm.
Keep AlmRecorder in Applications. The MCP configuration contains an absolute path to the bundled bridge and can break if the app moves.
If macOS still blocks the app
Try opening AlmRecorder once, then open System Settings → Privacy & Security and choose Open Anyway within about one hour. No Terminal command or system-wide security change is required.
Follow the five-step setup
The wizard checks the Mac, explains permissions, proposes four local model components, optionally connects Voice Memos, and ends with a direct path to Record or Library.
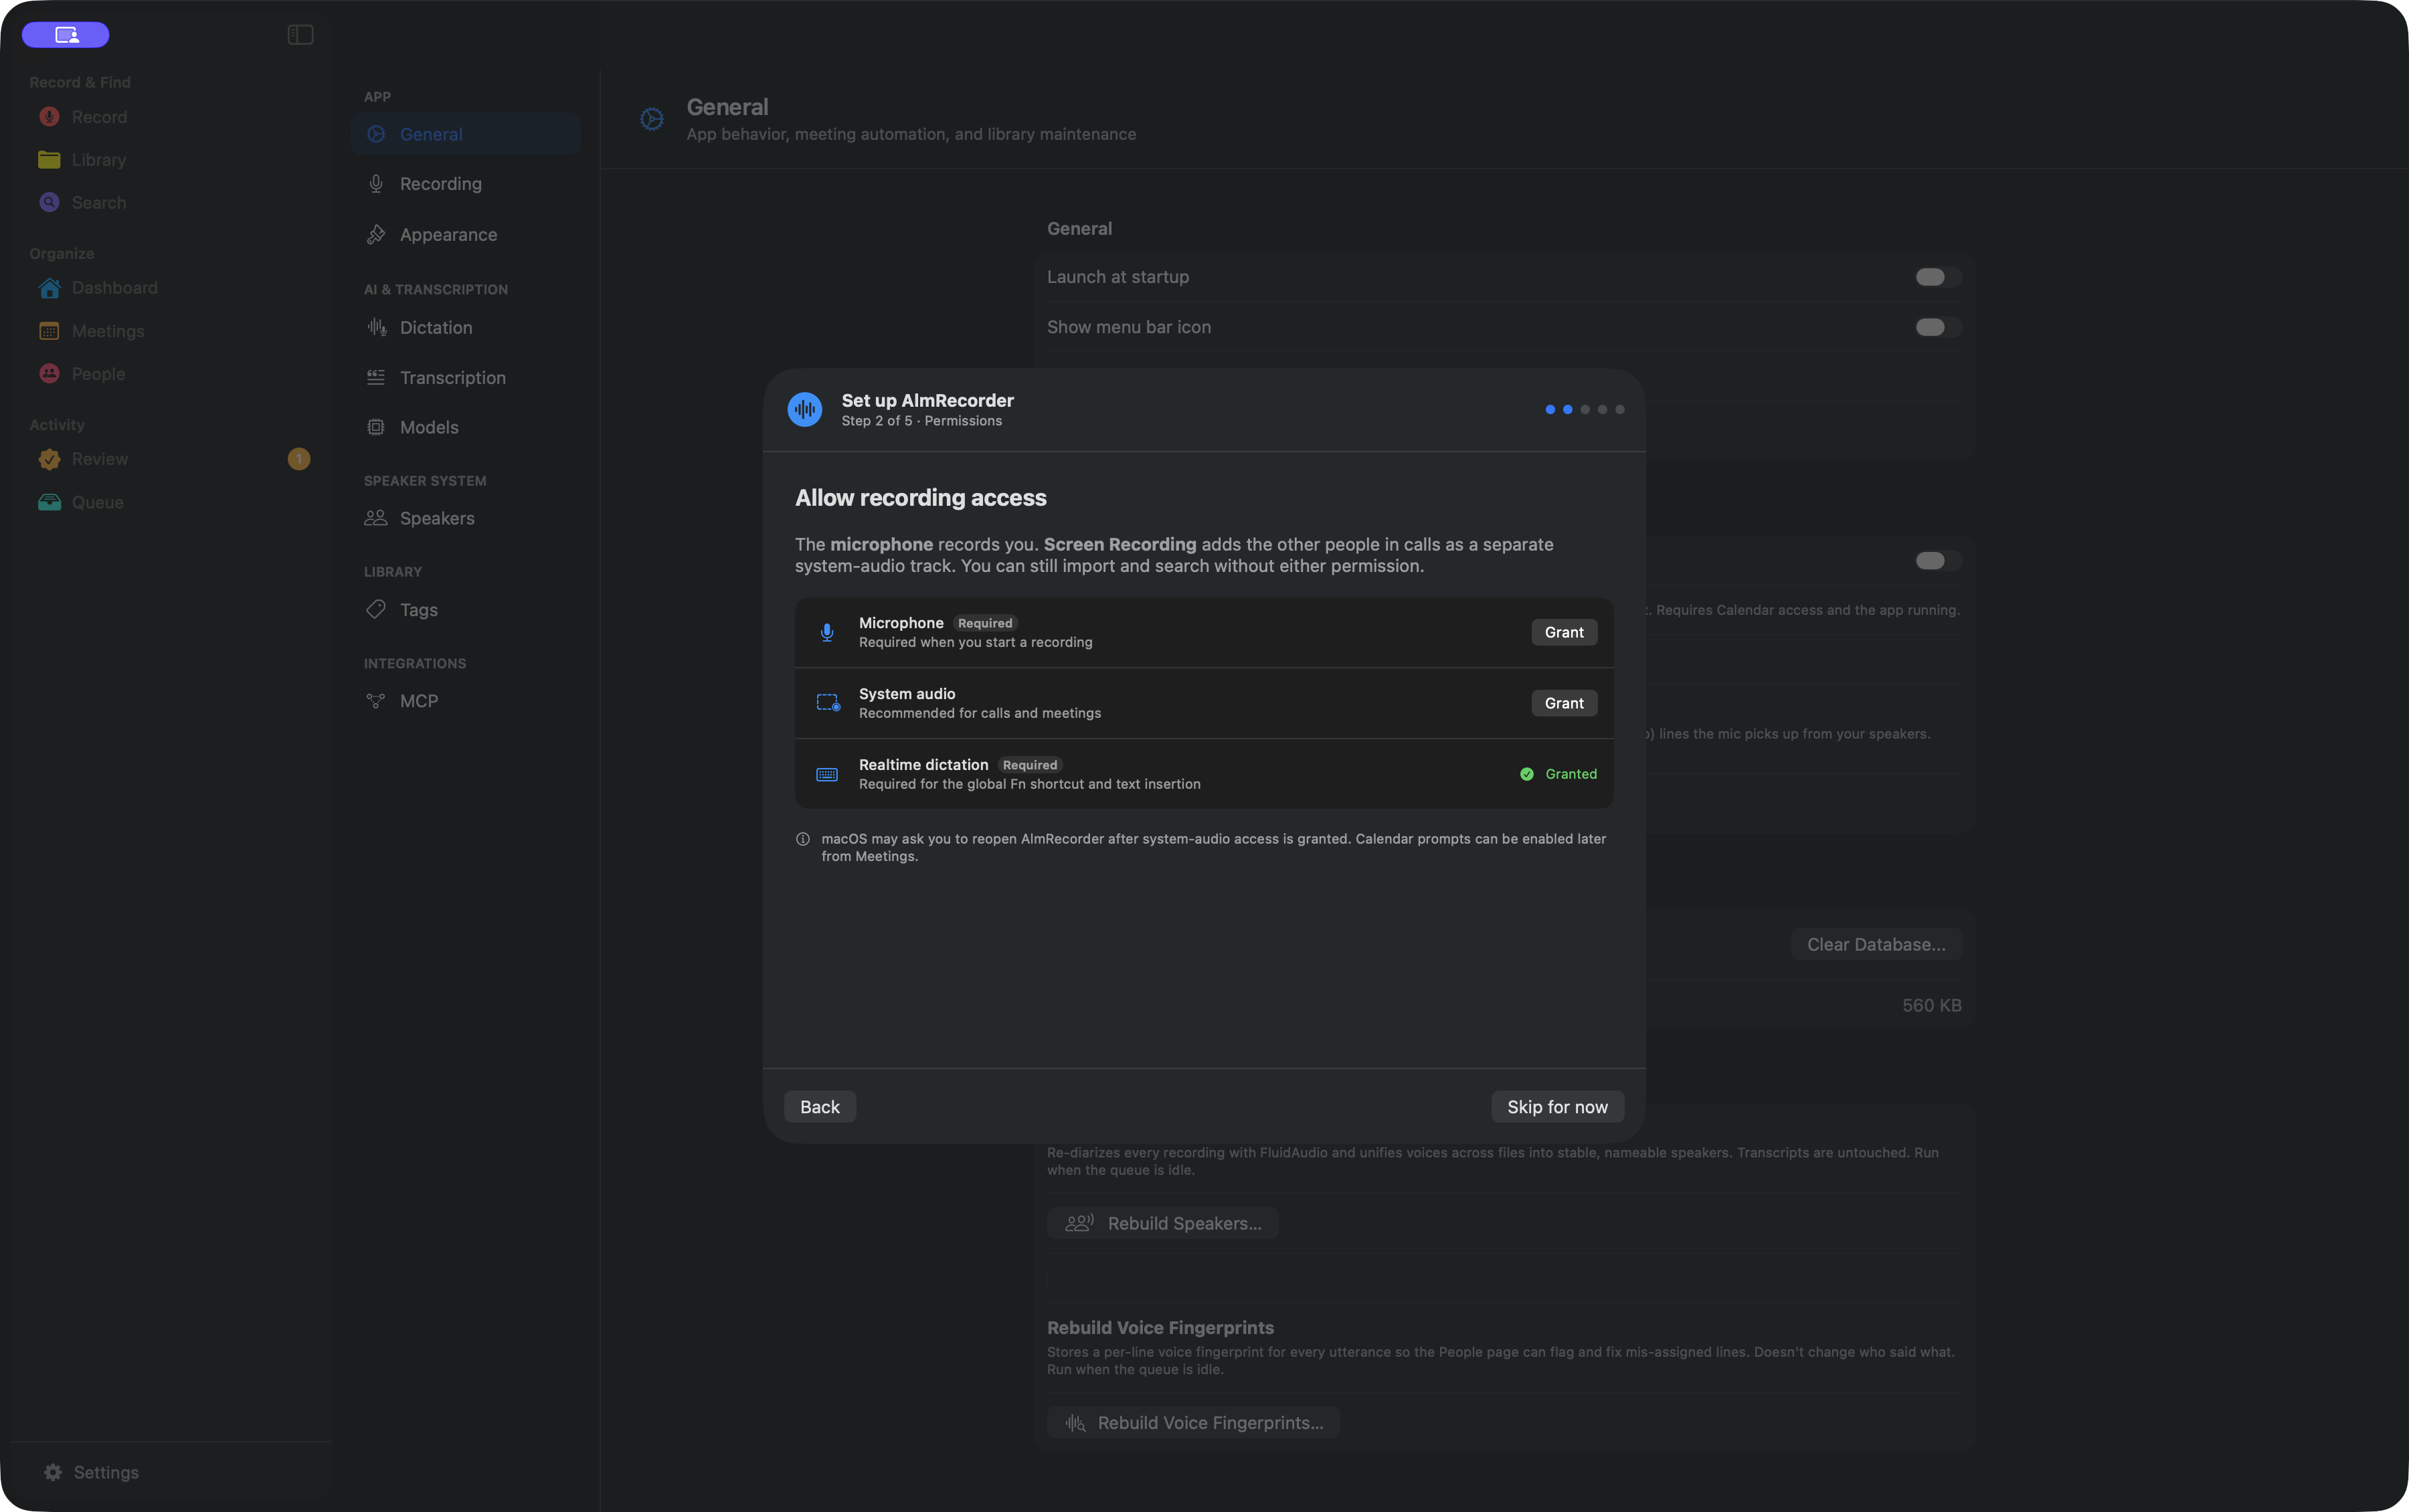
Know what each permission powers
- Microphone records your side of a conversation.
- Screen Recording captures Mac system audio—the other people in a call.
- Accessibility is required for the experimental global Fn dictation shortcut and text insertion.
- Calendar detects meetings. Notifications deliver prompts. Neither is required for recording or importing, though macOS can ask for them separately when those features initialize.
Importing and searching existing audio does not require Microphone or Screen Recording access.
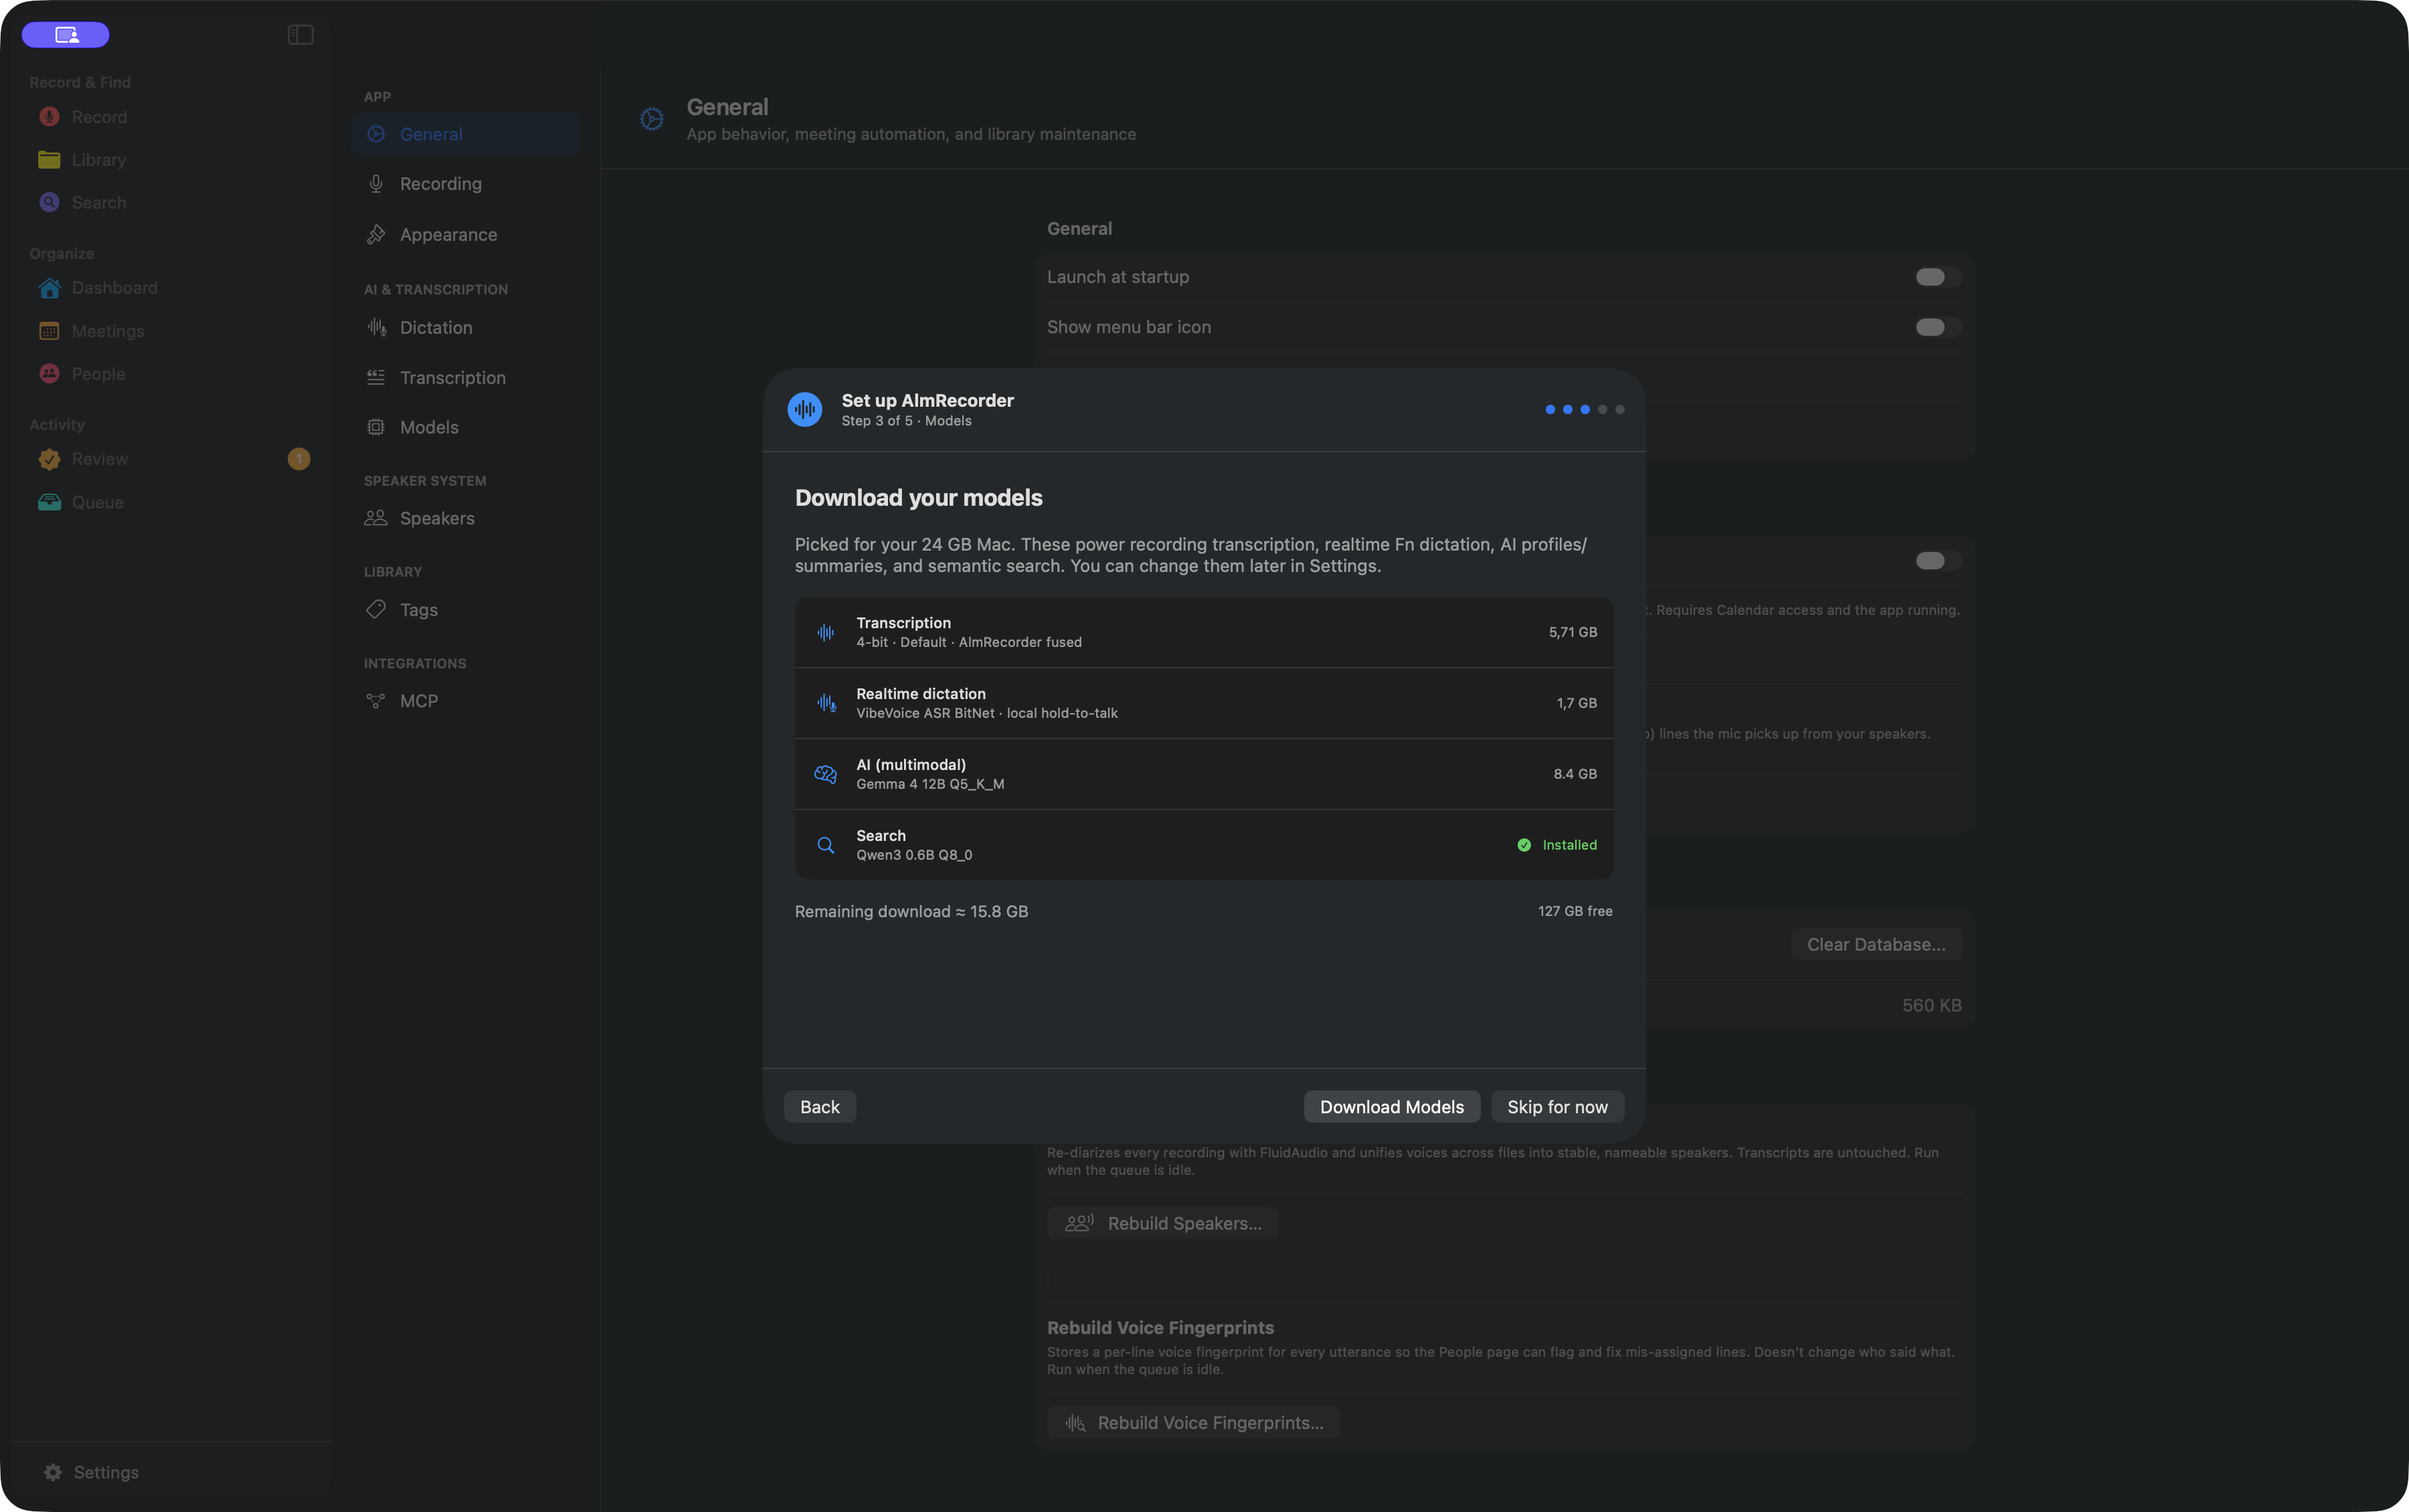
Choose the local model plan
The setup plan covers transcription, realtime dictation, multimodal AI, and semantic search. Model downloads are explicit and continue in the background while AlmRecorder stays open; opening the app by itself does not download them.
For the complete quality pipeline, keep the recommended defaults:
- VibeVoice 4-bit, AlmRecorder fused creates the first searchable transcript and speaker evidence.
- Whisper Large v3 Q5_0 creates an independent background reading.
- Gemma 4 12B Q5_K_M listens to short matching audio clips and applies only high-confidence text repairs. It does not change VibeVoice speakers, timestamps, or turn boundaries.
- Qwen embeddings add semantic search. Keyword search works as soon as the first transcript is saved; semantic search becomes available as its embedding jobs finish.
The later quality stages wait when another foreground transcription is running, a required model is missing, or memory is unsafe. They resume instead of forcing several large models into memory together.
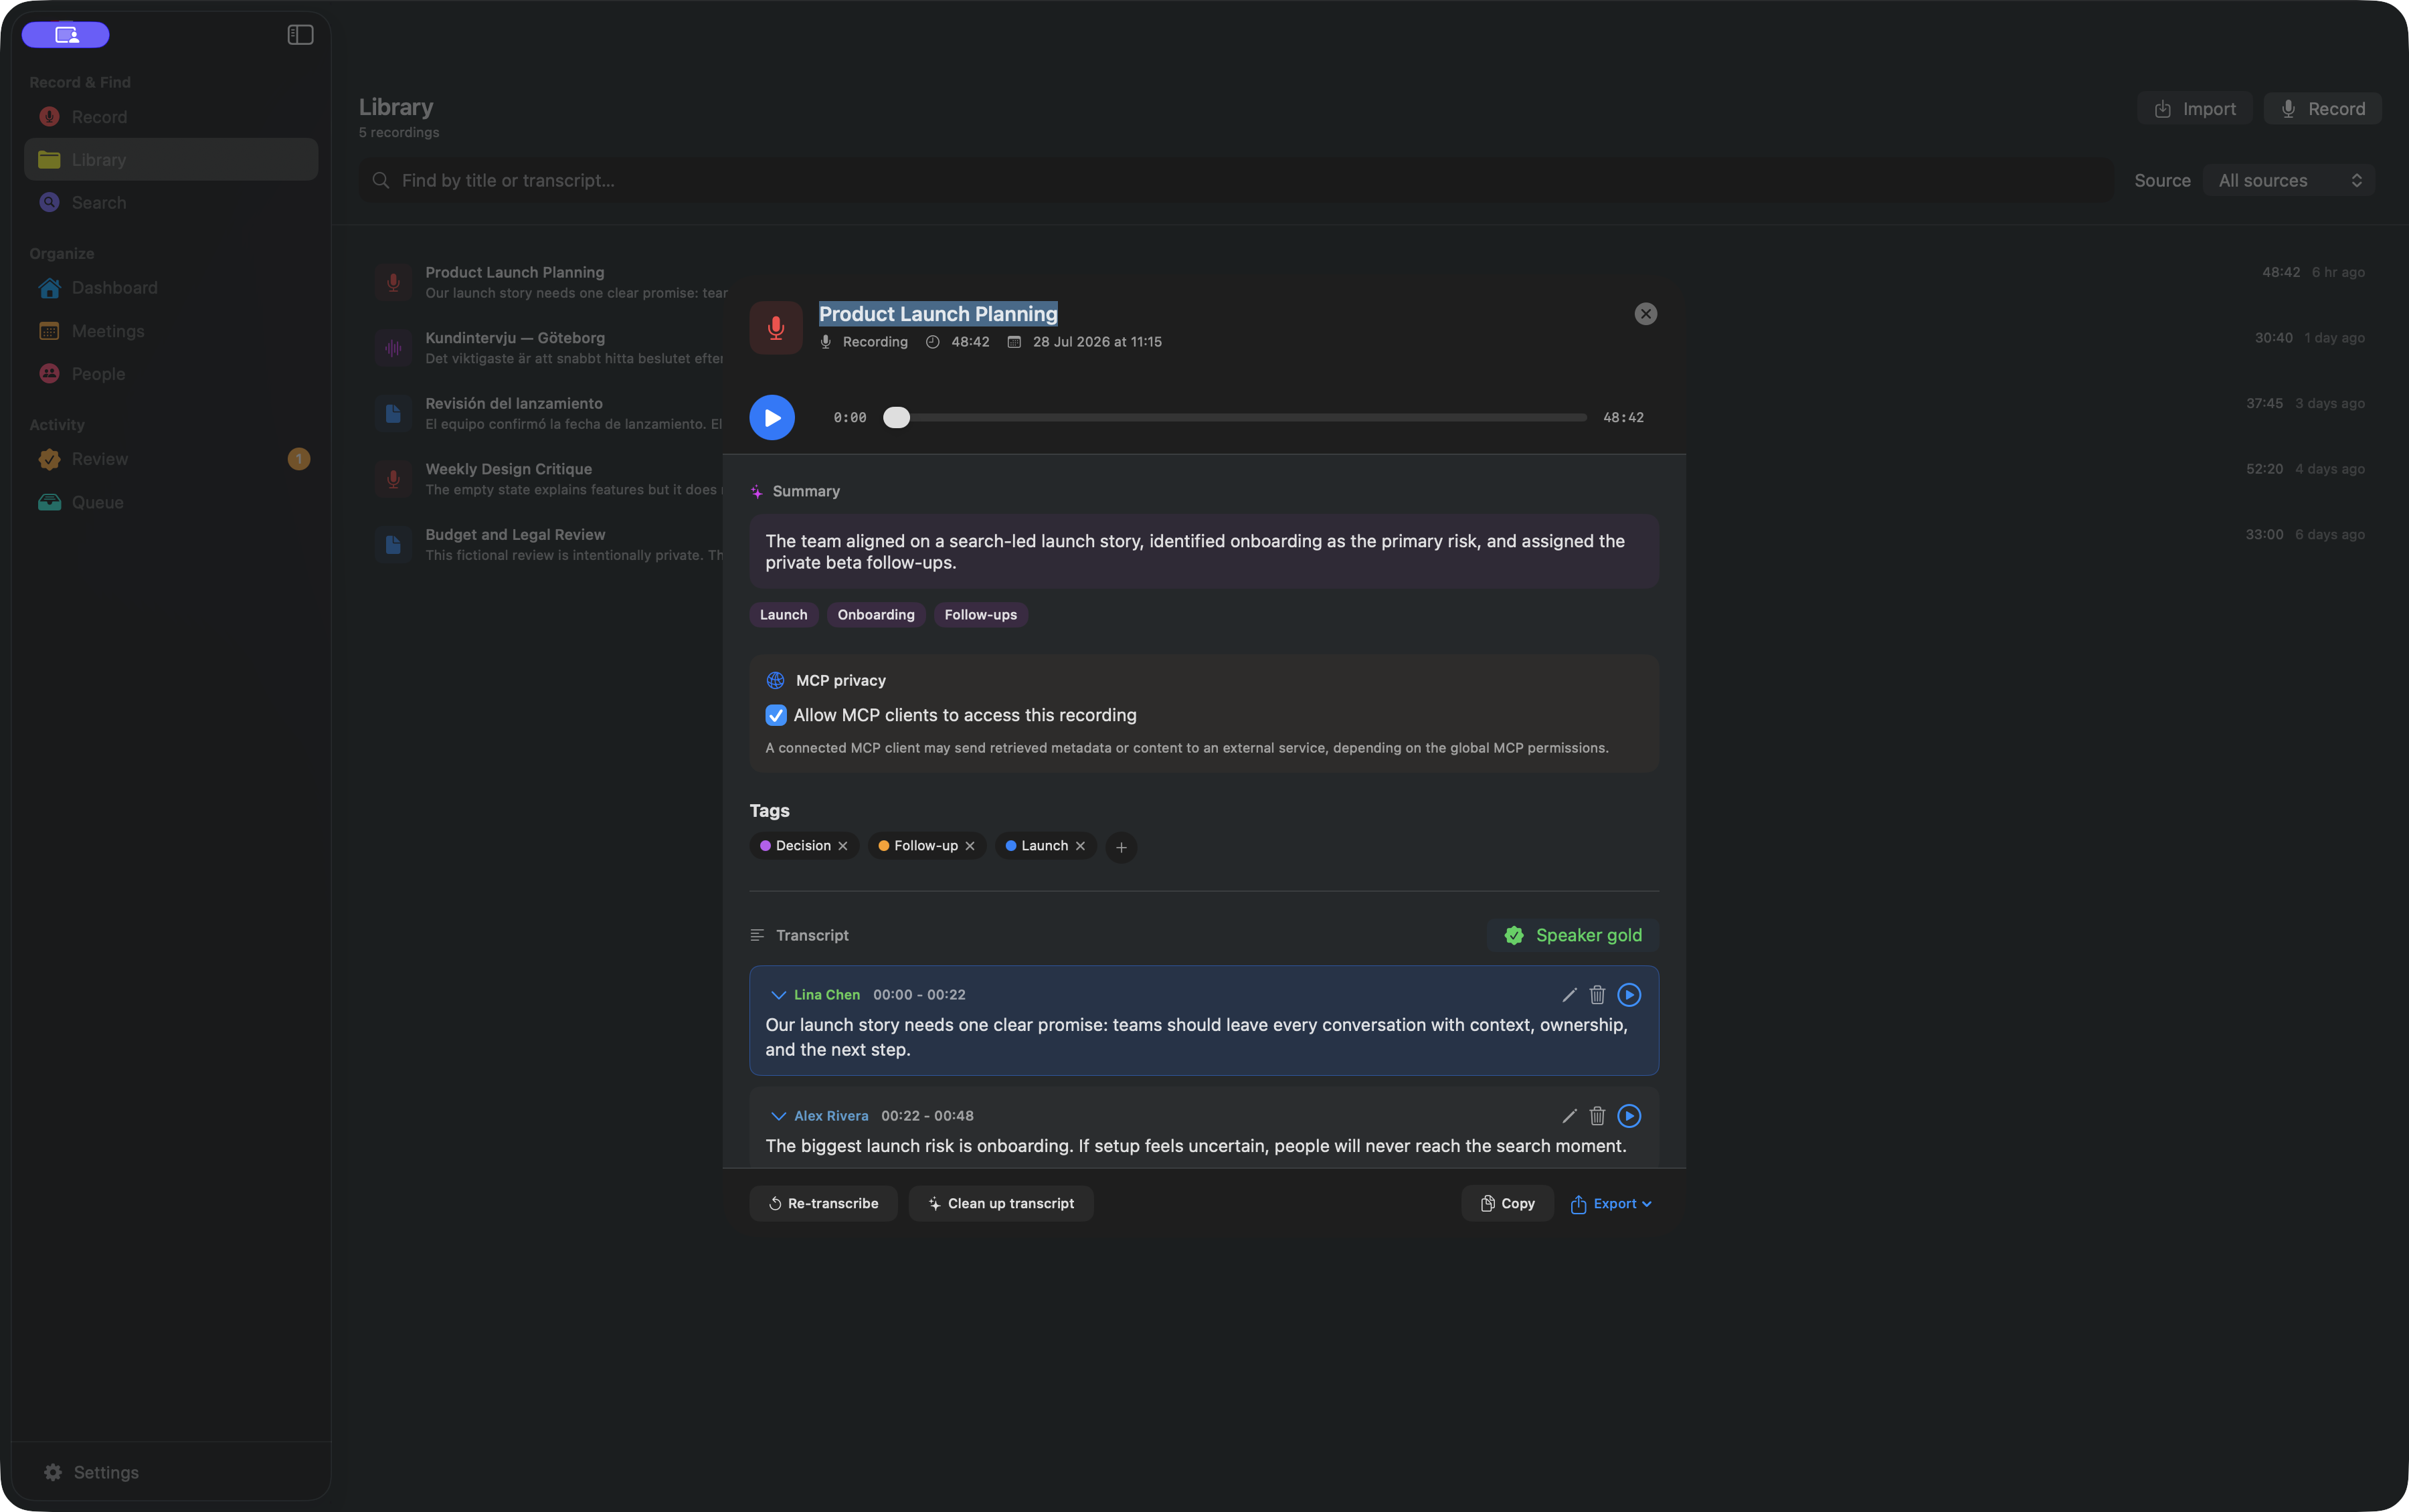
Create the first useful result
Open Record for a new meeting or Library → Import for an existing file. When transcription finishes, open the recording and confirm that the speakers, language, and timestamps look right.
Continue with Record and Import, or open the complete guide.